Hardware and Software Requirements
Before you install WSS 3.0, make sure your computer has the recommended hardware and software. Your server computer must meet the following hardware and software requirements.
Hardware Requirements
- A dual-processor computer with processor speed 2.5 GHz or higher.
- A minimum of 1GB RAM; however 2GB RAM is recommended for improved performance.
Software Requirements
- Windows Server 2003 SP2 as the Operating System.
- The file system used by the OS must be NTFS.
- The computer must be configured as a web server running Microsoft Internet Information Services (IIS) in IIS 6.0.
- .NET framework v3.0 or higher which enables ASP.NET 2.0 and includes Windows Workflow Foundation 3.0.
- SQL Server 2005 Express Edition with Advanced Settings.
Installing WSS V3.0 (Basic Mode)
Prerequisites
- Windows Server 2003 Enterprise Edition with SP2 installed.
- .NET Framework 3.0.
- ASP.NET 2.0 installed and Web Services Extension enabled.
- SQL Server 2005 with Advanced Settings installed.
Installation Steps
- Double click the Sharepoint.exe, it will start the installation process.
- Choose the installation type you want to install (from Basic, Advanced), here Basic is chosen.
- The setup will now apply the updates to the installation.
- Click Next to continue with the installation.
- The setup will now configure with the installation settings and installation will complete. The following screens will guide you through the process.

Figure 1.1 Basic Mode installation of WSS3.0
Figure 1.2 Applying updates to the installation.
Figure 1.3 Configuration Wizard in Basic Mode of installation.
Figure 1.4 Configuration of WSS 3.0 is complete with default configuration.
Installing WSS 3.0 (Advanced Mode)
Prerequisites
- Windows Server 2003 Enterprise Edition with SP2 installed.
- .NET Framework 3.0.
- ASP.NET 2.0 installed and Web Services Extension enabled.
- SQL Server 2005 with Advanced Settings installed.
Installation Steps
- Double click the Sharepoint.exe, it will start the installation process.
- Choose the installation type you want to install (from Basic, Advanced), here Advanced is chosen.

Figure 1.5 Advanced Mode installation of WSS 3.0
- In Server type tab; there will be two option as Web Front End and Stand-Alone.
a. Web-Front End: Only install components required to render content to users. Can add servers to form a SharePoint Farm.
b. Stand-Alone: Install all components on a single machine (Includes Windows Internal Database). Cannot add servers to create a SharePoint Farm. - Here in this installation Web Front End server type is chosen. As in this server type we can add servers to form a SharePoint Farm.
- In Data Location tab: choose the path of your search index files to be stored on the local hard drive.
- Start the installation by clicking on Install Now.

Figure 1.6 Selecting the Server type.
Figure 1.7 Choosing the location where the Data files will be stored.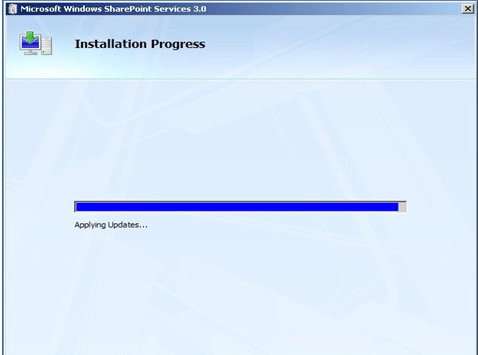
Figure 1.8 Starting the installation and applying updates. - After the installation is finished the configuration wizard will start; by checking the box prompted as "Run the SharePoint Products and Technology Configuration Wizard now". As shown below

Figure 1.9 Finishing the installation & starting the configuration wizard.
Configuring SharePoint Products and Technology
Prerequisites
- Name of database server and database where server farm configuration data will be stored.
- Username and password for the database access account that will administer the server farm.
Configuration Steps
- The configuration wizard requires the following services to be started or reset during the configuration
- Internet Information Services.
- SharePoint Administration Services.
- SharePoint Timer Service.
By clicking Yes the services are started or reset and to proceed for the configuration wizard.
- The Next screen in the wizard asks for the following options
- Connect to an existing server farm.
- Create a new server farm.
If there is a server farm you want to connect with to share configuration data; then connect to the server farm or create a new one.
Here creating a new farm is selected, as there was no availability of server farms in the system.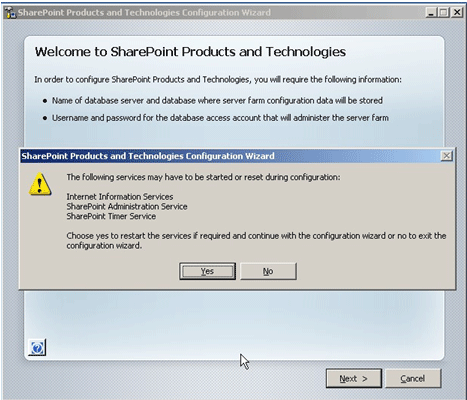
Figure 1.10 Requirements to proceed with configuration wizard.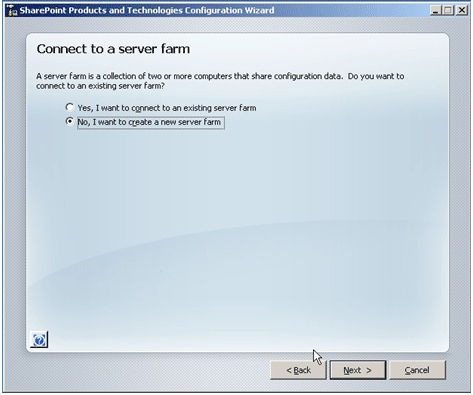
Figure 1.11 Connect to a Server Farm.
- The next screen will ask to specify the configuration for Database Settings. Such as the following details:
- Database Server Name.
- Database Name.
- Database Access Account Username.
- Database Access Account Password.
The following figure describes the configuration for database settings.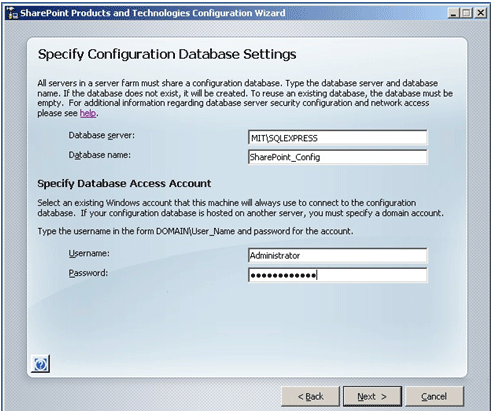
Figure 1.12 Configuring Database Settings.
- The next screen configures SharePoint Central Administration Web Application. It asks for the following requirements to specify such as:
- Specifying a port number for the web application hosted on this machine; the port number can be a number in between 1 to 65535. Otherwise system will take a random port number.
- Choosing an authentication provider for this Web application.
-> NTLM: NT LAN Manager is a Microsoft authentication protocol.
-> Kerberos: It is a computer network authentication protocol, which allows individuals communicating over a non-secure network to prove their identity to one another in a secure manner.
Here the NTLM authentication is chosen.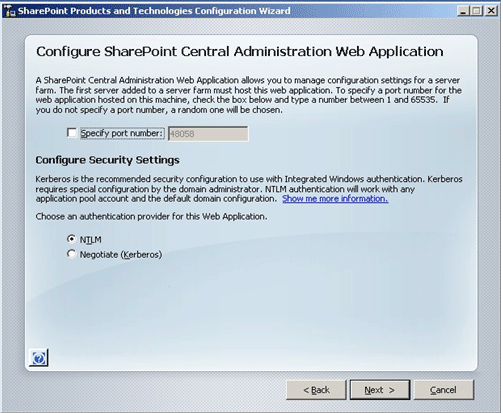
Figure 1.13 Configure SharePoint Central Administration Web Application.
- Complete the wizard by clicking Next or we can click Advanced Settings to enable the Active Directory creation Mode by providing Active Directory Domain and Organizational Unit.
Active Directory: It is a hierarchical collection of network resources that can contain users, computers, printers, and other Active Directories. Active Directory Services (ADS) allow administrators to handle and maintain all network resources from a single location.
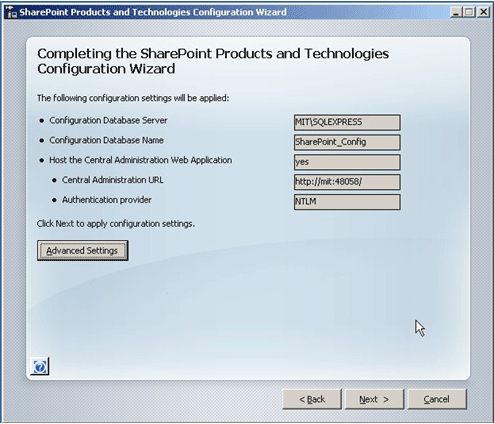
Figure 1.14 Completing the configuration wizard.
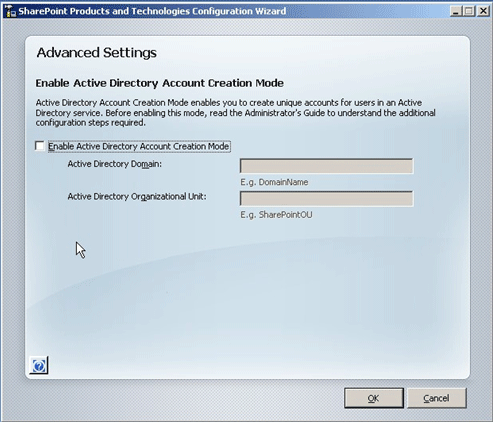
Figure 1.15 Advanced Settings for Enabling Active Directory Account.
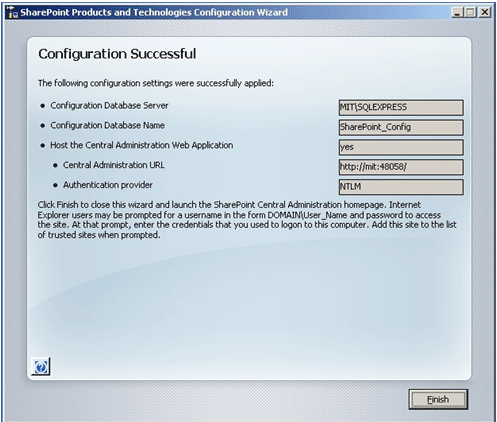
Figure 1.16 Click Finish to complete the configuration.
Summary
Basic Installation
In Basic installation mode we are provided with fewer options while installing. The setup continues with the default settings and configures the same.
Advanced Installation
In the case of advanced installation we are provided with ample options while installing as well as configuring.
Such as:
Figure 1.14 Completing the configuration wizard.
Figure 1.15 Advanced Settings for Enabling Active Directory Account.
Figure 1.16 Click Finish to complete the configuration.
Summary
Basic Installation
In Basic installation mode we are provided with fewer options while installing. The setup continues with the default settings and configures the same.
Advanced Installation
In the case of advanced installation we are provided with ample options while installing as well as configuring.
Such as:
- Server type
- Web Front-end
- Standalone
- Resetting or restarting of required services.
- Connecting to the Server Farm
- Connect to the existing Server Farm.
- Creating a new Server Farm
- Specifying Configuration Database Settings
- Database Server
- Database Name
- Specify Database Access Account
- Username
- Password
- Configuring SharePoint Central Administration Web Application
- Specify Port Number
- Configure security Settings
- NTLM security
- Kerberos security
- Advanced Settings for Enabling Active Directory Account Creation Mode
- Active Directory Domain
- Active Directory Organizational Unit
The difference between the two modes of installation depends on the user needs. If the user needs to install and wants to configure later Basic Mode is chosen. If the user needs to install as well as configure in more detail then advanced mode is chosen.
The basic installation installs the SQL Server 2005 Everywhere Edition and creates a web application at port 80 based on the team site template. But advanced installation creates no default web application or installs the SQL Server. Advanced installation installs only the front-end components that are required to render the website. It assumes that SQL Server 2005 is already installed
The basic installation installs the SQL Server 2005 Everywhere Edition and creates a web application at port 80 based on the team site template. But advanced installation creates no default web application or installs the SQL Server. Advanced installation installs only the front-end components that are required to render the website. It assumes that SQL Server 2005 is already installed